Digitize a cassette tape with Linux
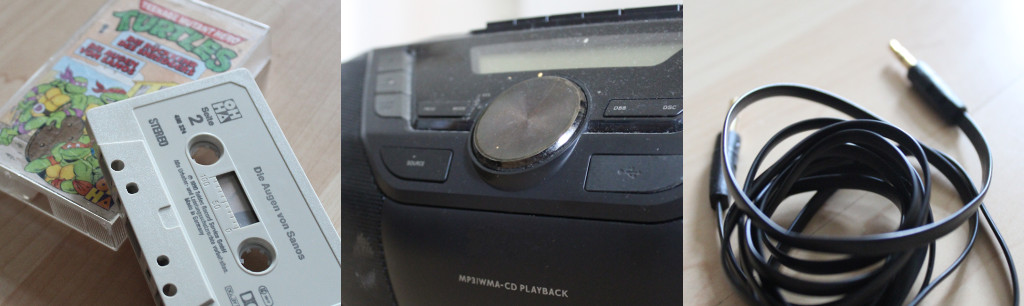
I have some old compact cassettes or tapes that I would like to digitize before time is destroying the quality completely. I will document the digitization with this post.
Recording
All we need is a tape recorder with an audio output, a audio cable and a computer with Linux and a audio input. In may case it is a 3.5 mm stereo phone connector cable and a Thinkpad with Debian 8 (jessie).
Enable audio input line-in
It was not trivial for me to enable the line-in of my Thinkpad as audio input. The basic sound settings of Debian had just Internal Microphone - Built-in Audio as input.
The program PulseAudio Volume Control was very helpful for this problem. I just enabled Microphone as audio input. You can install this program with the following command on Debian based operating systems.
apt-get install pavucontrol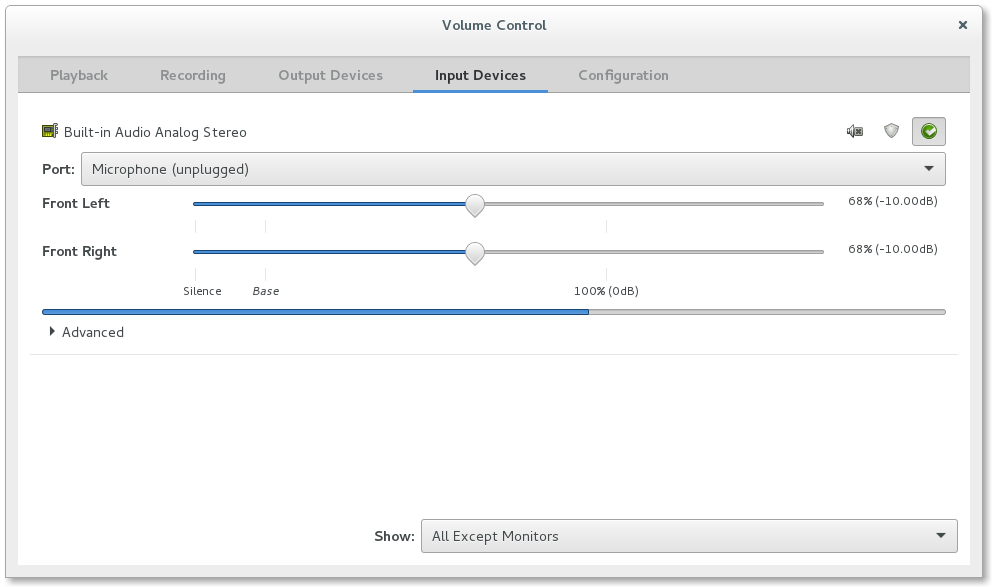
Audacity
My prefered program for recordings is Audacity. A very cool free, open source, cross-platform audio software for multi-track recording and editing. You can install Audacity on Debian based operating systems with the following command.
apt-get install audacityWe start with the play button of the tape recorder and push the red Record button of Audacity simultaneously.
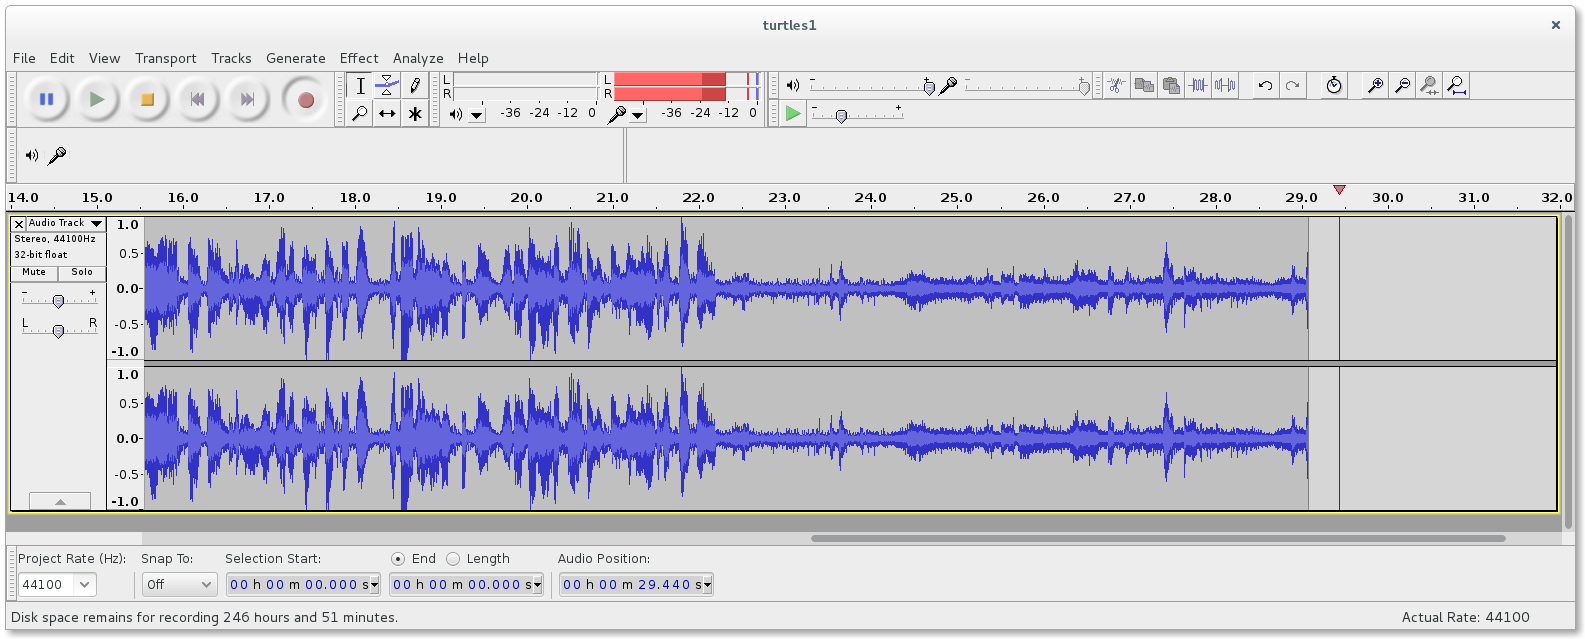
Stop the recording with the yellow Stop button when the tape ends.
Playback is too fast
A very common problem that happend to me was a too fast playback. The record was fine, but the playback was too fast when pushing the Play button of Audacity. There seems to be a problem with PulseAudio.
The post audacity playback is too fast helped me to solve this problem. I have just saved the record as Audacity project and closed the program. We can now replace the line
Exec=audacity %Fwith
Exec=env PULSE_LATENCY_MSEC=30 audacity %Uin the file /usr/share/applications/audacity.desktop.Or we can start Audacity with the command line.
env PULSE_LATENCY_MSEC=30 audacityEdit the record
We have now a bare record. But there are a few thing we need to do.
Noise Removal
Especially old tapes have a terrible quality. But also the tape recorder is maybe not the best one. So we need to remove some noise.

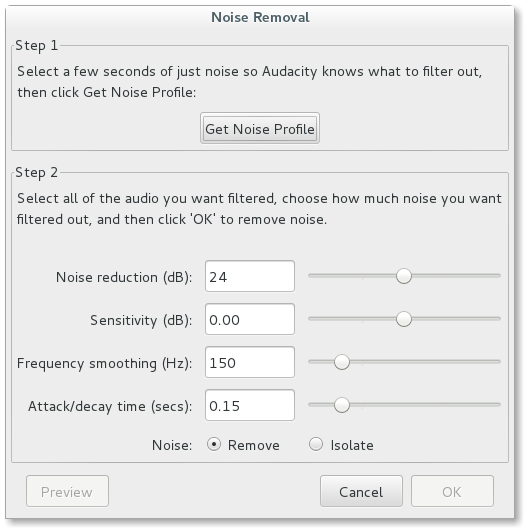
Step 1
There should be zero line at the beginning of the record. This line doesn't seems to be a real zero line. We will select some seconds of that line. After that we will select Effect and Noise Removal... in the menu of Audacity. Both steps of Noise Removal are again explained. Please push the button Get Noise Profile in Step 1.
Step 2
The Noise Removal subwindow should close itself now. As explained in the subwindow we will now select the whole record. This can be done with Ctrl+A. We will subtract the detected noise profile now from the whole record by entering again Effect and Noise Removal... in the menu. But now we will push the button OK in Step 2.
Cut the zero lines
We will now delete the zero lines at the beginning and at the end of the record. Just select the record from the beginning to the end of the zero line and execute Delete in the menu item Edit. We should do the same with the zero line at the end of the record.
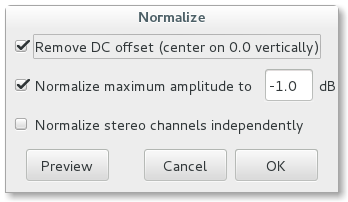
Normalize
The record should be normalized before exporting. We will select again the whole record and push Normalize... in the menu item Effect. The Normalize maximum amplitude to should be -1.0 dB. Please push the button OK.
Export
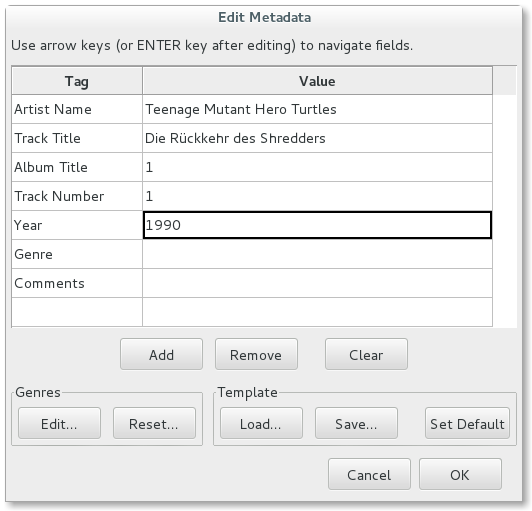
The record is ready now. We can export it. Just click on Export Audio... in the menu item File, select a filename and a format. In my case it was Ogg Vorbis. After pushing the Save button you have to enter some metadata. In my case a german tape, Die Rückkehr des Shredders from Teenage Mutant Hero Turtles. Please push the OK button after entering the metadata.